
I built a TNC! In particular a NucleoTNC.
What’s a TNC, you ask? In the ham radio, there exist “digital” modes, where, instead of transmitting voice or morse code, you transmit digital information over the radio waves.
In order to transmit digital information over an analog signal, it has to be converted from digital to analog, in a process called modulation. Converting from the analog wave back to digital is called demodulation. Somebody a long time ago decided to stick these two words together and shorten them to modulator/demodulator, or “modem”.
Terminal Node Controller (TNC)
A TNC is a specialized form of modem, but it works in a very similar way to the thing that made squawking noises that you used to plug into your phone line. Digital information goes in one end, and a sequence of audio tones comes out the other.
You connect the audio input and output to a radio’s speaker and mic respectively, and then the digital connection connects to the computer, in this case via USB.
When TNCs, or “Terminal Node Controllers” were first invented, the TNC contained enough “smarts” to be able to communicate handle packets of incoming and outgoing data; all you had to do was hook up a dumb terminal to it and type in your commands.
While there are still TNCs like this today, the average modern computer has more than enough computing power to handle a lot of the tasks that firmware of a TNC used to handle. So, Mike Cheponis and Phil Karn invented a simple protocol, literally called “Keep it Simple, Stupid” or KISS, that basically just put the TNC in charge of the analog to digital (and vice versa) conversion and let the computer do all the fancy work with the networking layers.
There are ways to move even more of the processing workload to the computer, by making use of the computer’s sound card to do analog to digital processing. I would say that Direwolf is the leading software for doing this in the ham world.
However, a sound card just produces and receives audio signals; if you use Direwolf, you will need to come up with a way to trigger the Push-to-Talk (PTT) on the radio, in order to signal the radio when it is time to transmit. Most solutions rely on a USB-to-serial adapter in order to make this happen.
I’m a Mac guy and I like a minimal amount of cables hanging off the computer, so I liked the idea of having a little purpose-built box for the job. A couple of years ago, I purchased a Mobilinkd TNC2, which connects to the Mac via Bluetooth and has a custom cable that goes to whatever radio you might have to handle speaker, mic, and PTT.
The only downside I’ve found is that I often forget to charge the TNC2’s battery, so it’s usually dead when I go to use it. I recently realized that I could just connect it to the computer with a USB cable and let it charge while I was using it, but I find that the mini-USB (not micro) cable tends to get misplaced a lot.
NucleoTNC
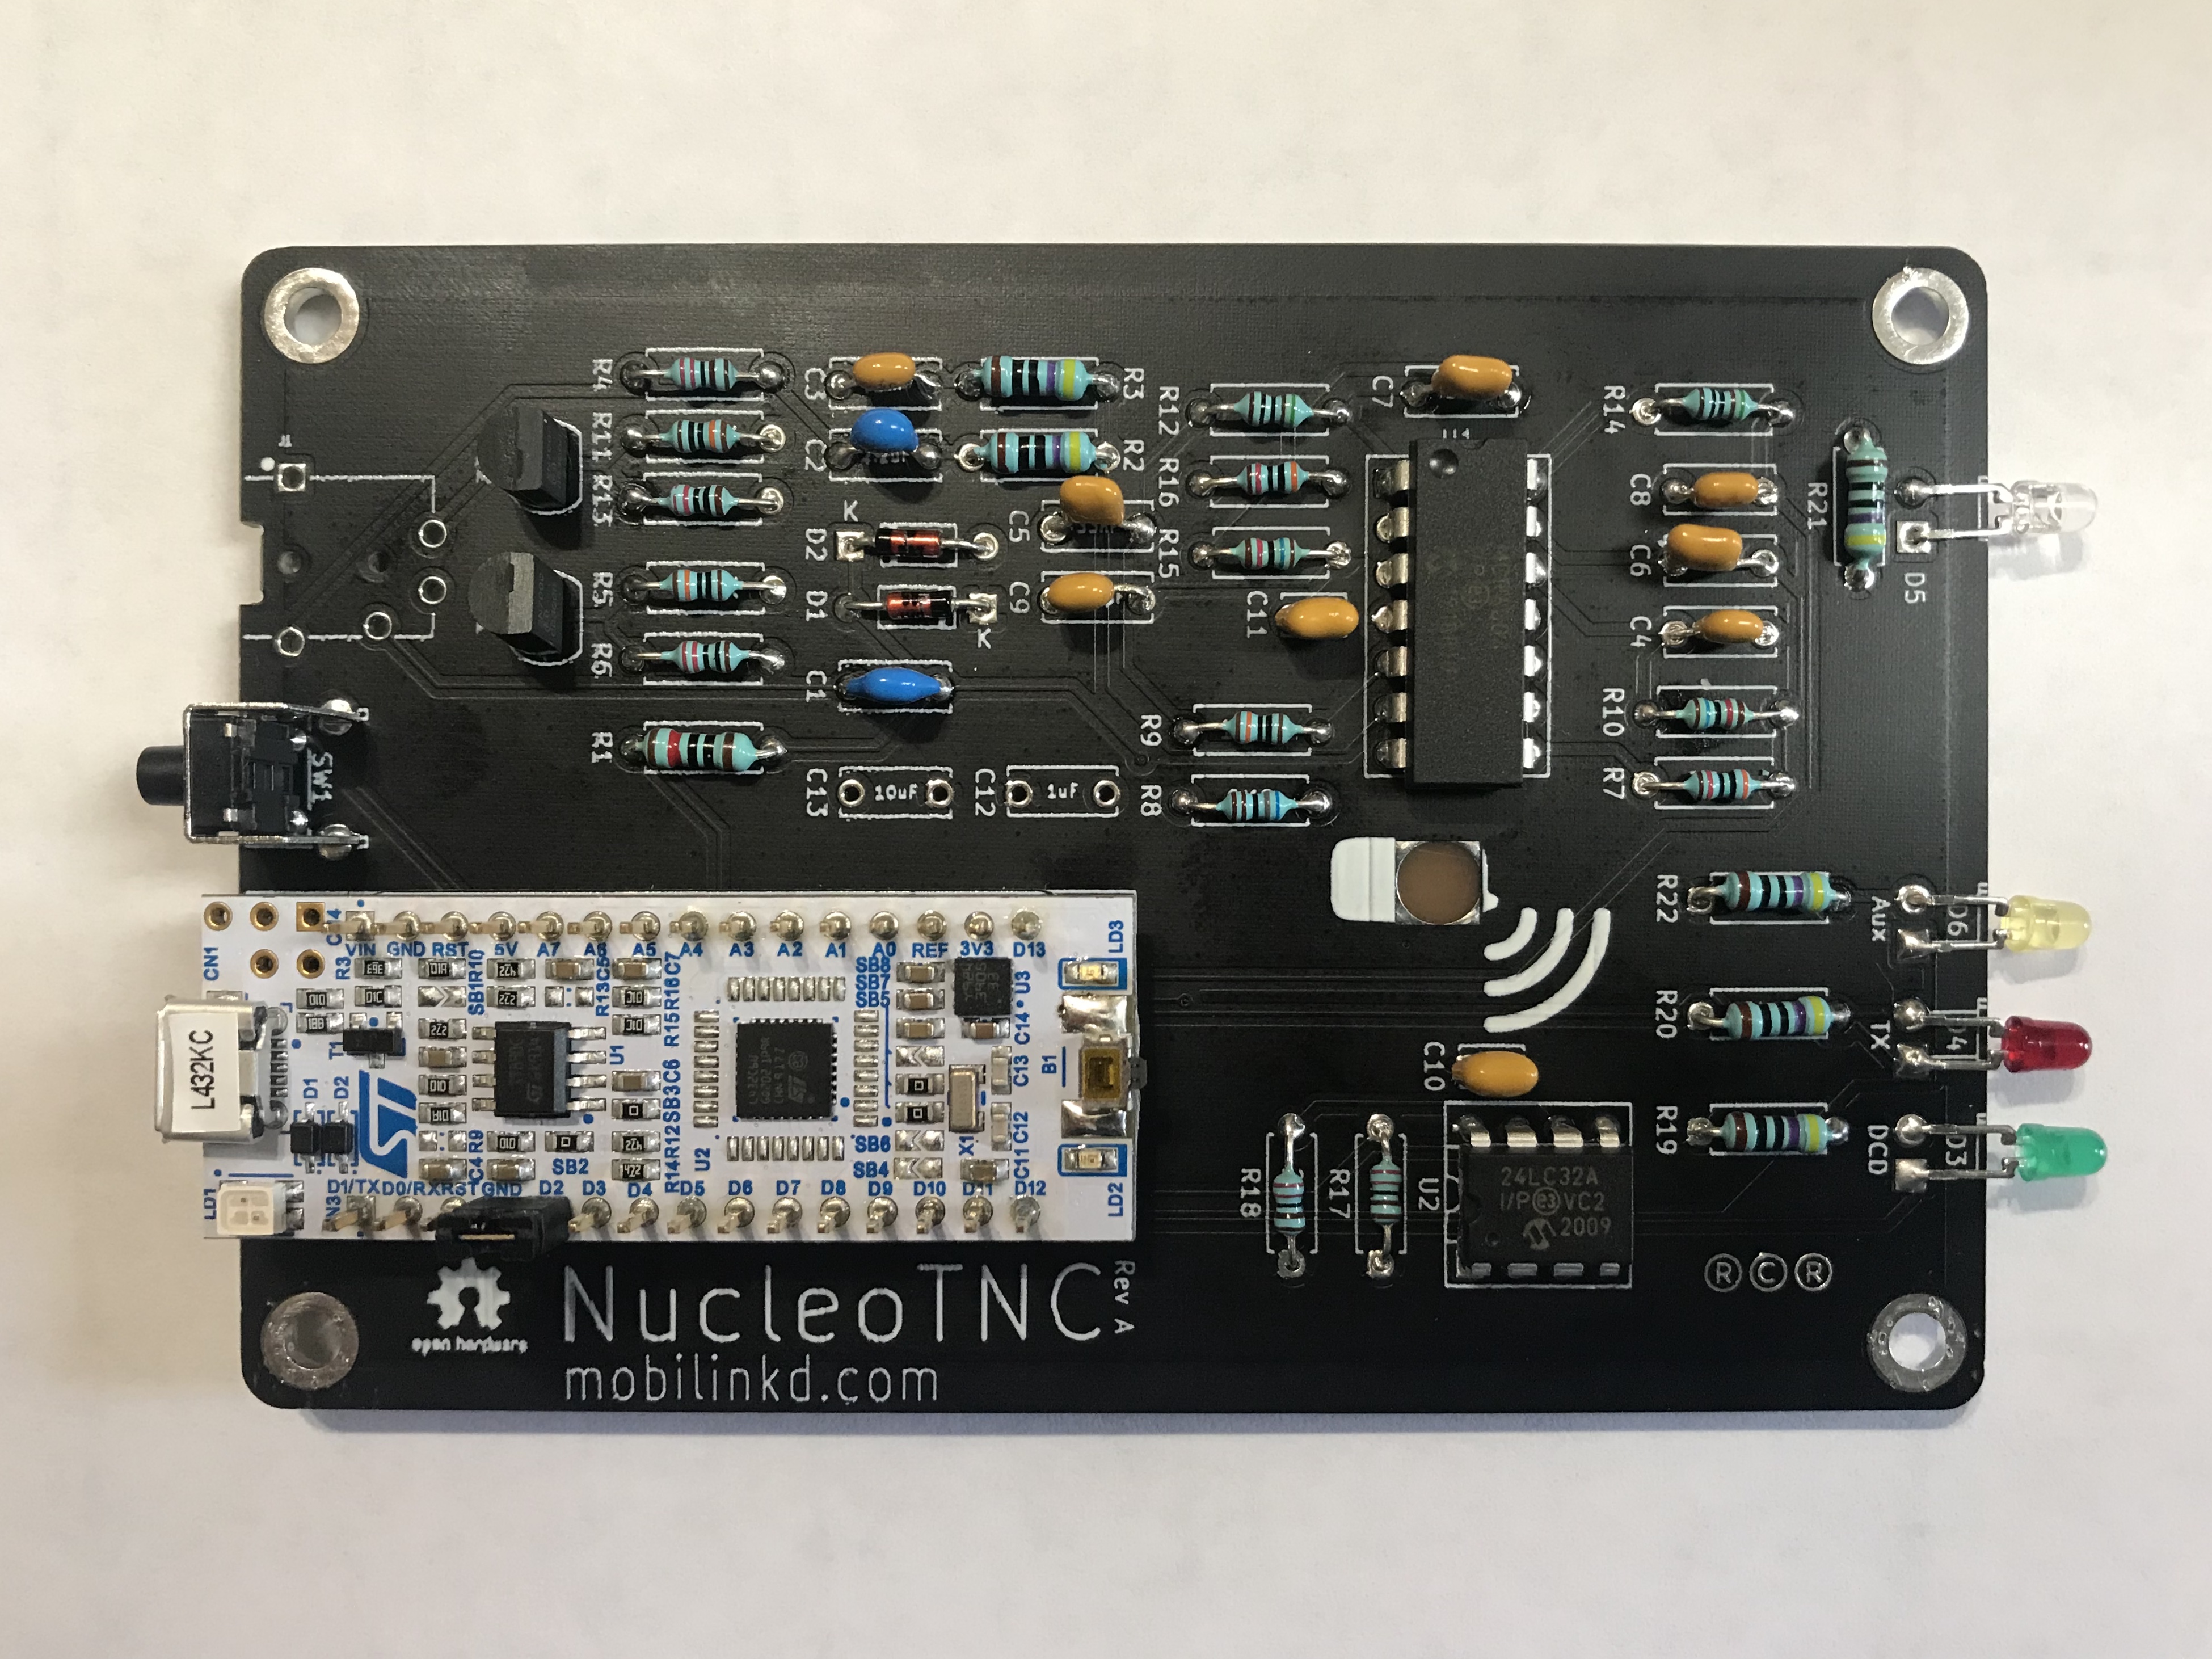
A while back, Rob Riggs, the owner of Mobilinkd had shared the technology used in the TNC2 as a DIY breadboard build, called the “NucleoTNC” (because it uses a Nucleo32 ‘brain’).
It seemed like a neat project, but it didn’t seem very easy to move around due to the wires on the breadboard. However, when he announced a printed circuit board for sale, and a metal enclosure to match, I was ready to take the leap.
I also wanted to have another type of TNC to test with my APRS software, QTH. I already had it working with the TNC2, but this would give me another board variety to test.
I ordered the board and enclosure from Mobilinkd’s online store and the rest of the parts from Digi-Key, using the handy bill of materials link that Rob provided. I ended up having to order the TRRS connector from Mouser, because Digi-Key was backordered for more than a month on those.
Once the parts all arrived, I used my beginner soldering skills to solder all the parts on the board. Here is the result:
Testing the NucleoTNC
Now, I am not a “confident solderer”, so I am very quick to assume that anything is wrong is because I screwed up when soldering the board. This led me to overlook two stupid mistakes and spend a lot of time trying to figure out what was wrong. I’m describing them here so that you can learn from my mistake.
Mistake #1: PTT didn’t work
I had a cable for my Baofeng UV-5R that I used with my TNC2, and the NucleoTNC uses the same cables, so I was in business there.
I hooked the NucleoTNC up to the Baofeng, connected a dummy load, and fired up the Mobilinkd config app. There is a function of the config app that tells the TNC to send a continuous tone, for testing.
I clicked the button, and...... nothing. Normally the display on the radio changes color when it is transmitting. It didn’t do anything.
Then it occurred to me that the output of the TNC to the radio is just a simple audio signal, so I made a little “patch panel” from a small breadboard and hooked up the phone connector to a pair of earbuds, so that I could hear if the audio tones were being generated.
Thankfully, I could hear the tones in my earbuds, so that mean the audio output was working, it just wasn’t triggering the PTT.
I spent a bunch of time with the multimeter and the schematic, trying to trace back the PTT circuit to the right pin on the Nucleo32 board.
It was then that I noticed the jumper between the ground pin and the PTT pin. That jumper had been come installed in that position right out of the box, so I had just assumed that it was supposed to be there.
I pulled off the jumper, and.... voilá, the PTT worked.
Mistake #2: Received data is garbled
With the transmit working, I turned my attention to the receive functionality. I live in an area where there is not a lot of APRS traffic, so I needed a way to generate incoming traffic in a predictable way.
Once again, the fact that this is just an audio signal came in handy again. I used my patch panel to route speaker jack output of my Mac to the audio input of the NucleoTNC. Once that was connected, I downloaded the audio tracks from the WA8LMF Test CD and played it out the speakers.
The good news was that the DCD LED was lighting up whenever there was supposed to be a packet in the audio stream. But nothing was coming in to the APRS app(s). I tried both YAAC and QTH and neither of them were receiving packets. Since QTH is software that I’m developing myself, I knew exactly where to put breakpoints to inspect the data coming in.
Oddly, I was not getting any “FEND” bytes at all. This is a pretty crucial byte in the KISS protocol, because it marks where a packet of data starts and ends.
I ended up breaking down and posting a message on the Mobilinkd forum, asking if anyone had any ideas about what was wrong. Rob replied and asked me if I had set the baud to 38400 like it says in the instructions…
Oops. I had it at 9600 for some unknown reason.
Success
Picture from Mobilinkd.com, but mine looks identical to this, except the green LED on mine sticks out about a millimeter or two more
So, now I have a working NucleoTNC. Once I’m done testing it with QTH, who knows, maybe I’ll finally get a 2 meter antenna on my big tower and build an APRS digipeater.